Looking for a creative activity to do with the kids? Why not consider making a dream catcher ? As well as being an attractive decoration to hang over a bed or throughout the room, the dreamcatcher has the following features a symbolic and comforting meaning. According to legend, it helps ward off bad dreams and promotes peaceful sleep, making it an ideal project for younger children. But how to make a dream catcher ?
In this article, Kidlee with DIY ideas and practical tips! With your help, your child will be able to how to make a dream catcher. Before we do, let's explore the origins and significance of this object.
What is the origin of the dream catcher?
The dream catcher is rooted in Native cultureto the Ojibway tribe. Legend has it that a man, looking after his brothers and sisters, set out as usual on a hunt. Finding no prey, he wandered off towards a mountain.
He then encountered a terrifying beast, the memory of which would haunt his nights as soon as he closed his eyes to go to sleep. Exhausted by his nightmares, he went into the forest one day, exhausted, and fell asleep.
When he woke up, he found a spider's web above him and concluded that it was thanks to her that he hadn't had any nightmares.
He decided to try again, and once again, he had no nightmares! Little by little, the story spread among his tribe.
Women began making spider-web-inspired dreamcatchers to catch their dreams. protect residents from bad dreams. The dream catcher is designed to capture bad dreams and destroy them at dawn.

What does the dream catcher represent?
According to legend, the hoop symbolizes the sun. Visit traditional dream-catcher weaving evokes a spider's web that captures bad dreams, which are burnt away by the first rays of sunlight. The eight points of contact with the hoop correspond to the eight legs of the spider.
The pearl in the center of the weave represents the spider itself.
This pearl makes it possible to keeping sweet dreams alivewhile feathers make dreaming easier from the pearl to the dream catcher.
The dream catcher protects its creator or the recipient to whom it is given. It is therefore preferable that this object be handled by as few people as possible.
Originally, dreamcatchers were used mainly for designed to protect children and babies from bad dreams. In Amerindian culture, dreams are seen as a link between man and the Great Spirit, and good dreams have a positive influence on a child's development.
If he focuses on his beautiful dreams, he'll be more inclined to adopt a positive attitude.
Over the years, dreamcatchers have become spiritual decorative objects for hanging on bedroom walls or above the bed.
Since then, several types of dream catcher have emerged to be placed in different rooms, adding a bohemian decorative touch as well as a spiritual dimension. Dreamcatchers are also said to absorb negative waves in their environment.
How to make your own dream catcher?
If you'd like to know how to make dreamcatchers with the kids, there are DIYs available for everyone. If you're a babysitter, consider organizing a small creative workshop on a Wednesday. If you're a FamilyTake advantage of a rainy weekend to make dreamcatchers together.
Mini dream catcher simplified
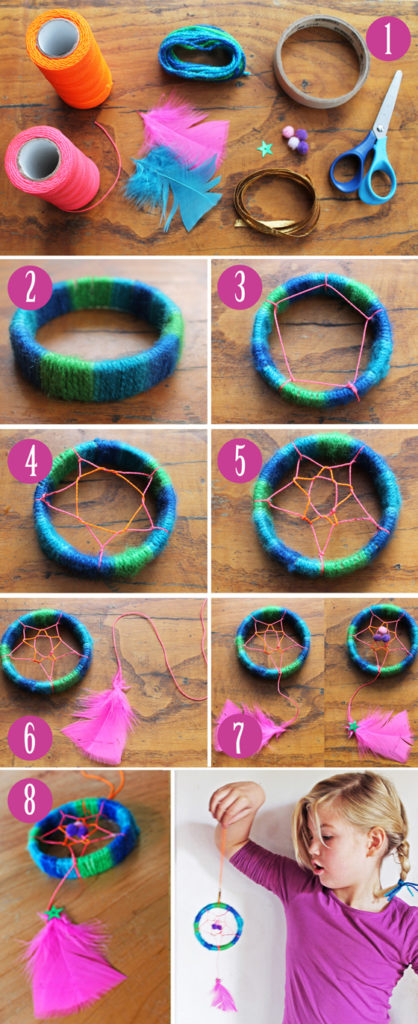
The dream catcher shown here is simplified, both in terms of weaving and the number of beads and feathers. To make it, simply follow the steps below:
- Material preparation : Gather an empty roll of tape, a pair of scissors, wool, feathers, colored thread and other decorations.
- Wool winding : Wrap the wool around the roll until it's completely covered. Secure with a knot.
- Weaving creation : Take a length of colored string and tie a knot around your hoop at regular intervals. Then stretch the string to a central point and form a loop. Continue making evenly-spaced loops until you've gone all the way around.
- Repeating the process : repeat with a second length of string, then a third.
- Adding feathers: tie a length of string to a feather and secure it with a knot at the bottom of your hoop.
- Final decoration : add a few decorations, such as mini pompoms or a glitter star.
- Suspension : the final step is to attach a loop of string at the top to hang your dream catcher.
Source: HappyThough.co.uk
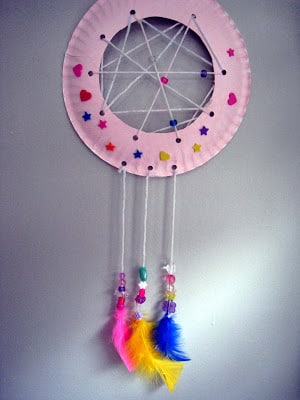
Children's DIY: how to make a dream catcher from a paper plate


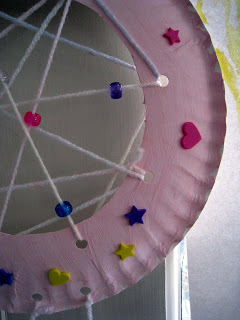
To make this dream catcher, you will need the following items:
- A paper plate;
- Scissors;
- Paint;
- Thread;
- Feathers;
- Pearls;
- A hole punch ;
- Stickers.
The steps:
- Cutting : decpez the center of the plate to create your circle. Punch holes around the edge and paint the plate.
- Feather preparation : While the plate is drying, attach the thread to each feather and add the pearls for decoration. Repeat for three strings of beautifully decorated feathers.
- Weaving on the plate: Once the plate is dry, thread your thread randomly through the holes and add a few beads to embellish. You can also decorate with stickers if you like.
- Feather attachment : drill three holes towards the bottom of the dream catcher and attach the feathers.
Your dreamcatcher is now ready to hang on the wall or above the bed. If your child has a bad dream, invite him or her to blow into the sensor!
Source: 4 Crazy Kings
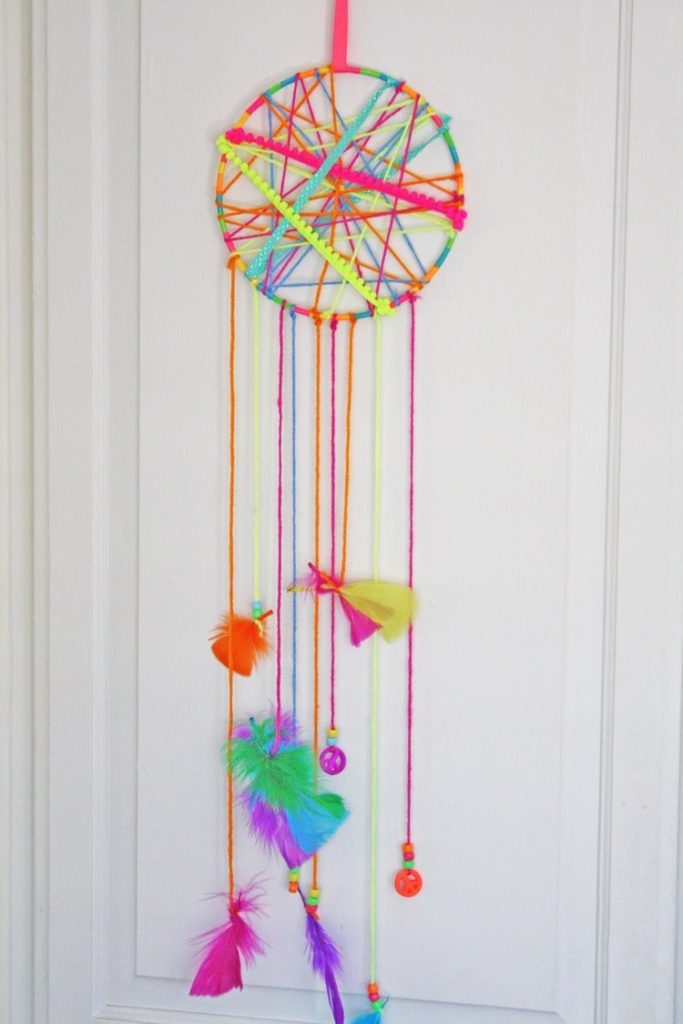
Colorful dream catcher
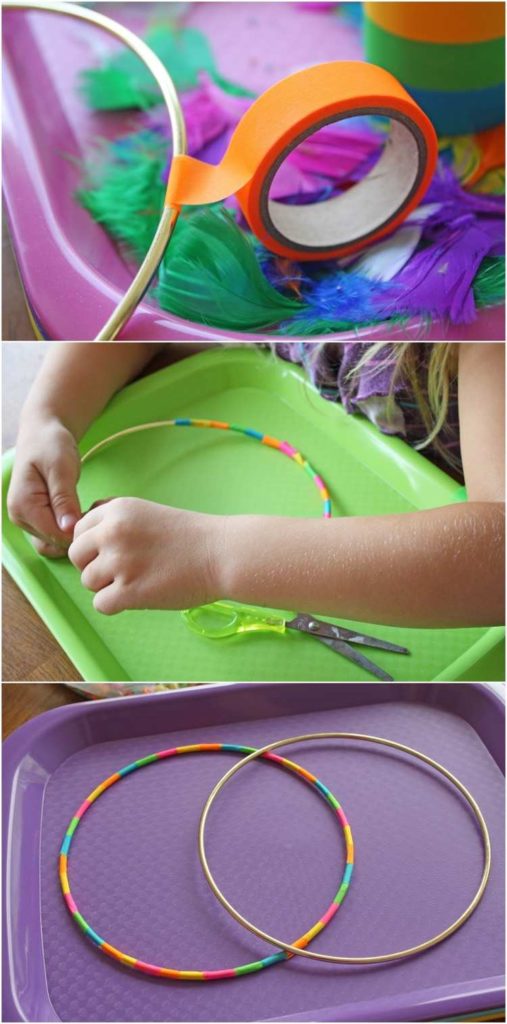
For this version, assemble the following materials:
- An embroidery drum
- A few balls of brightly coloured wool
- Coloured adhesive tape
- Multicolored wooden beads
- Pompoms
Realization:
- Hoop winding : wrap the wooden hoops with adhesive tape to match the desired decoration.
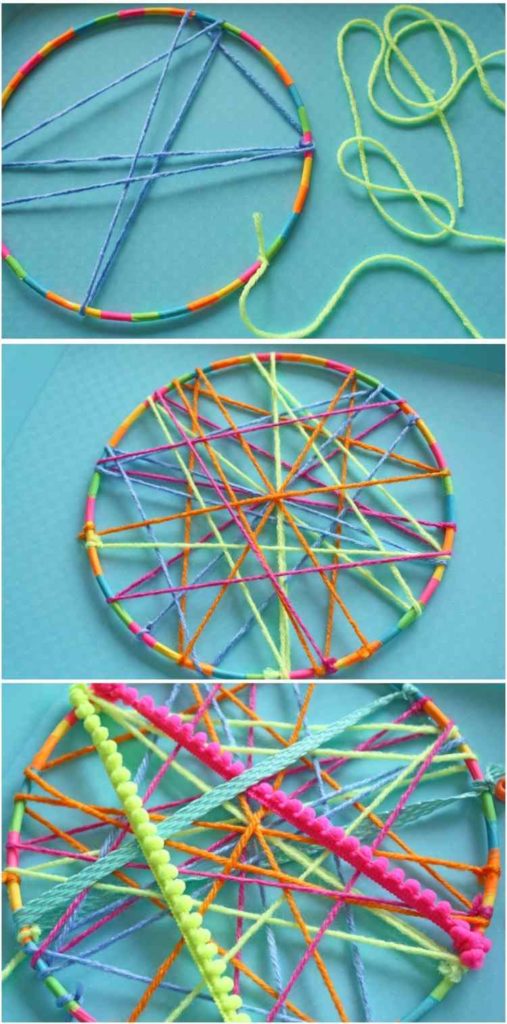
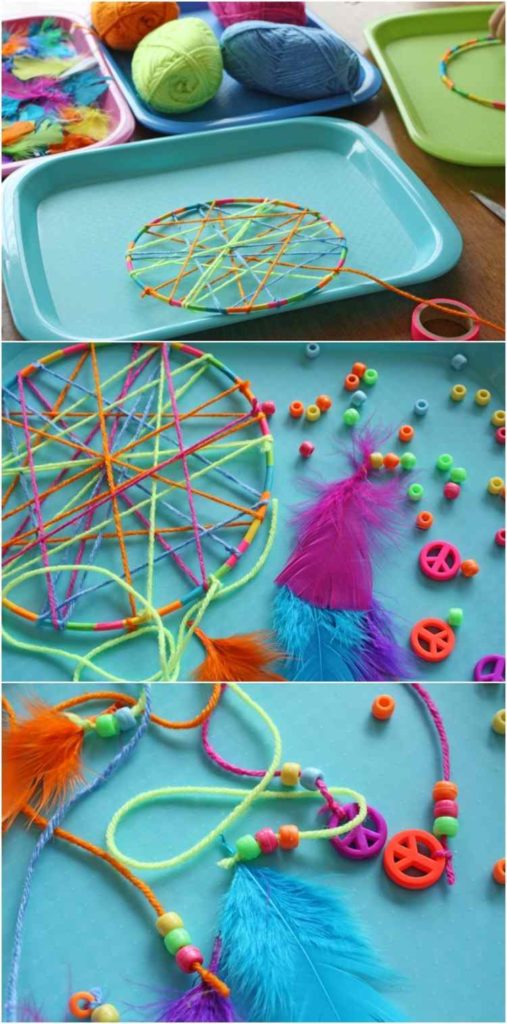
- Canvas creation : Use string of different colors to create several passes and a full weave. Make a few garlands from string and beads to give your dreamcatcher a finished look.
Source: Deavita
Children's DIY: how to make a dreamcatcher in 5 steps :
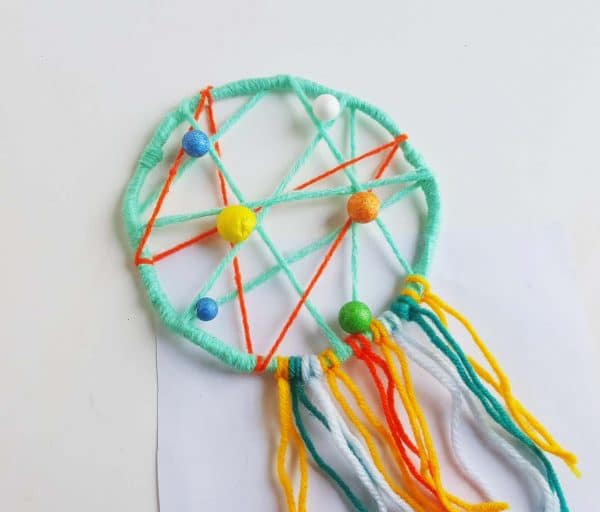
You will need the following items:
- A round base for the dream catcher (metal ring)
- Scissors
- Remaining strands of wire - different colors
- Adhesive glue
- Colorful handcrafted feathers
- Colored Styrofoam balls
- Pompoms
The steps will be as follows:
- Take a metal hoop and wrap it entirely with wire, then finish with two tight knots with the remaining wire.
- Take 1 or 2 strands of yarn of different colors and wind them randomly inside the base to create a random pattern.
- Once the weaving is complete, attach coloured thread to the bottom of the circle.
- Glue Styrofoam balls to the weave to add even more decoration.
- Finally, attach the colorful craft feathers and pompons to the open ends of the wires attached to the bottom of the circle.
Find the DIY in detail on : Craftbits
Small video tutorial to make the famous traditional canvas:
We share with you this video which shows how traditional weaving can be done with ease. If your child wants a real dream catcher, you can take care of the weaving while he adds the decorations to the threads that hold the feathers!
https://www.pinterest.fr/pin/705868941594772286/