Spring is here. The birds are singing, the flowers are blooming, the sun is smiling on us (and so is the pollen allergy!). What a great opportunity to do manual activities and spring crafts. On one hand, to discover the particularities of this beautiful season and on the other hand to have fun and color our afternoons! For this purpose, Kidlee shares spring-themed creative activity ideas! Find 5 spring crafts ideas to make with kids!
Insects in toilet paper rolls: basic spring craft!
Discover the different insects that appear during spring!
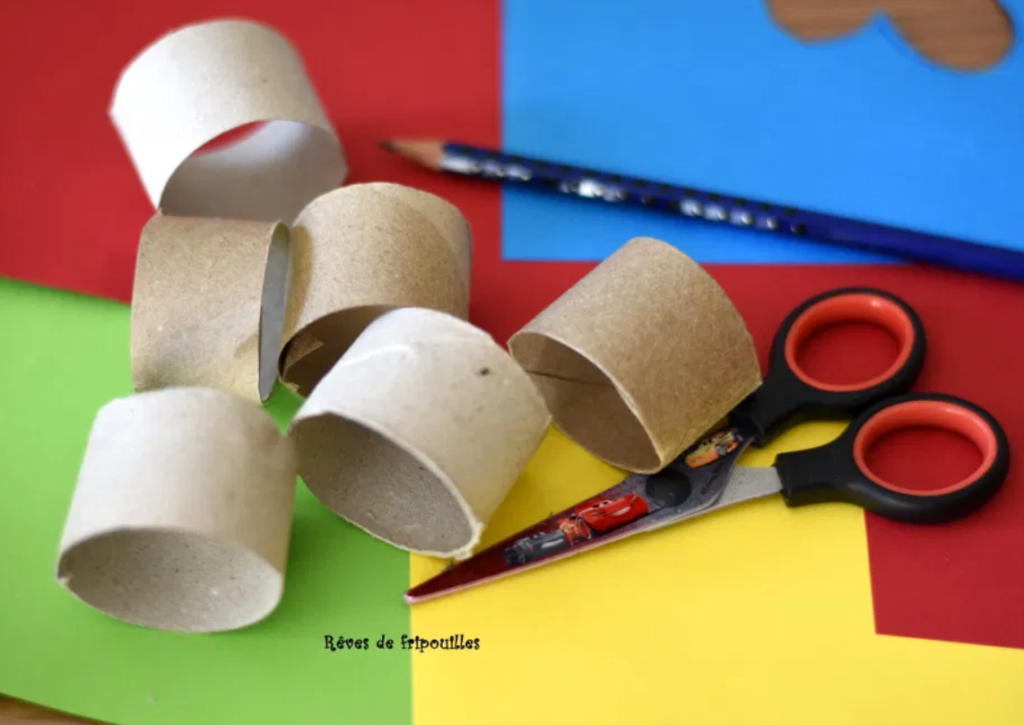
To complete this creative activity, you will need:
- Toilet paper rolls
- Colored papers
- Moving eyes
- White paper
- Scissors, glue, black marker
Bee
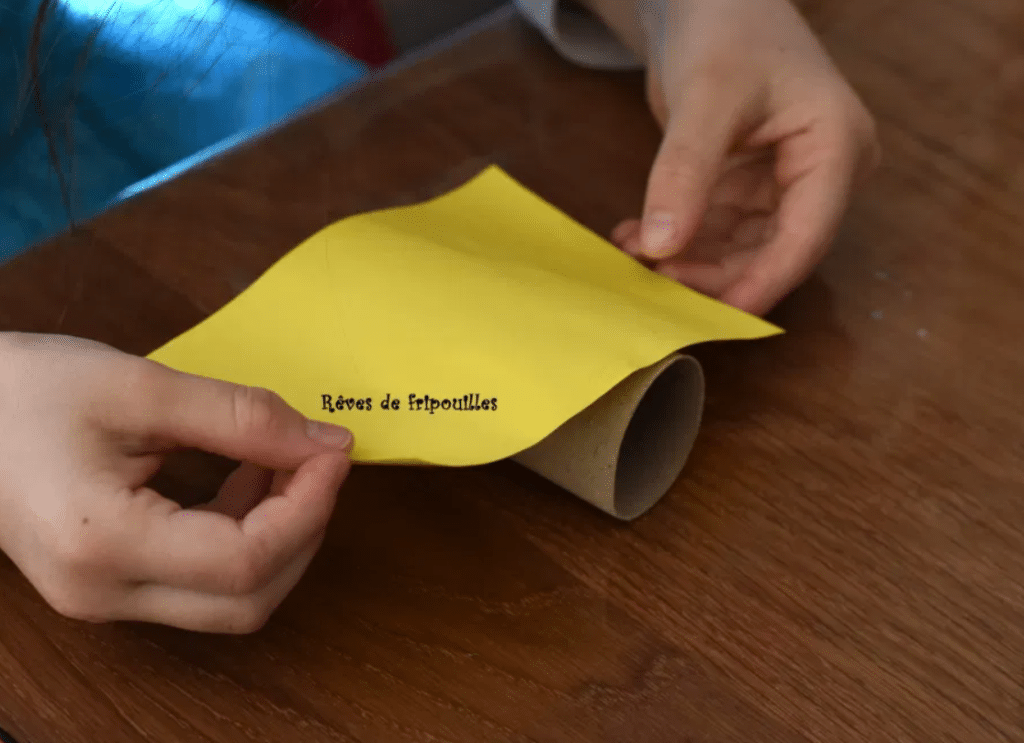
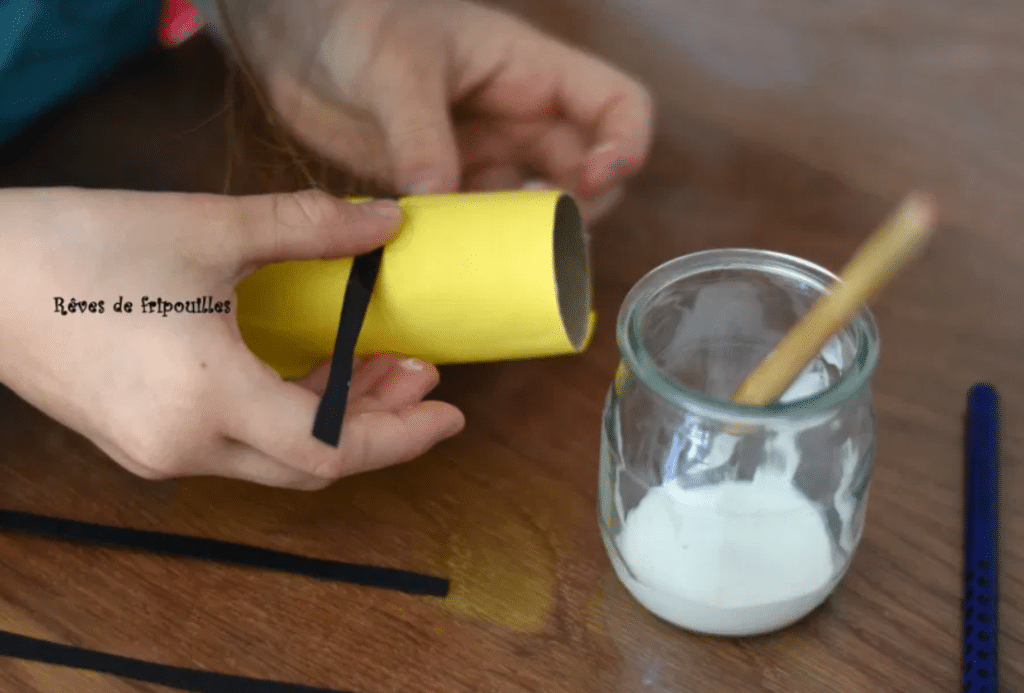
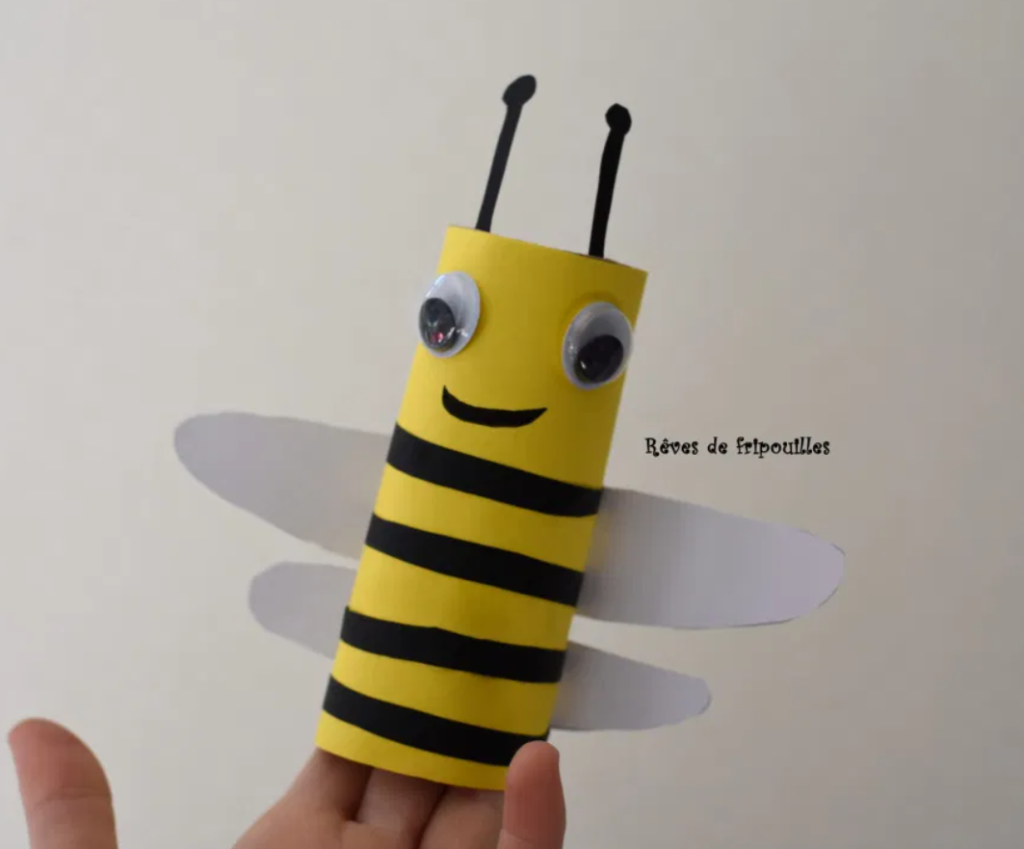
First, we'll start by measuring, cutting and gluing a yellow sheet around the toilet paper roll.
For the black stripes, we will measure and cut strips from black paper and glue them on 2/3 of the roll.
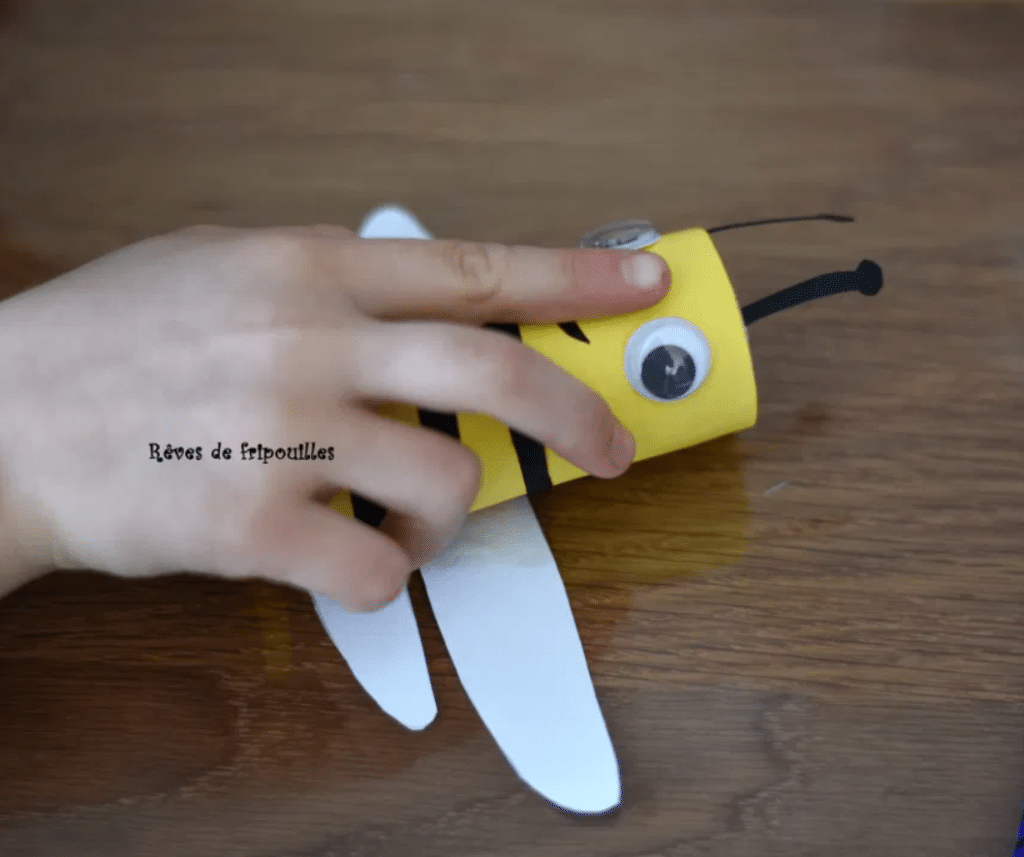
Once the bee body is finished, draw eyes and draw the mouth in the 1/3 left free. If you have movable eyes, glue them on directly!
Finally, draw and cut out wings from white paper and antennae from black paper and add all of this to your bee. Wings on the back and antennas on the head!
Beetle
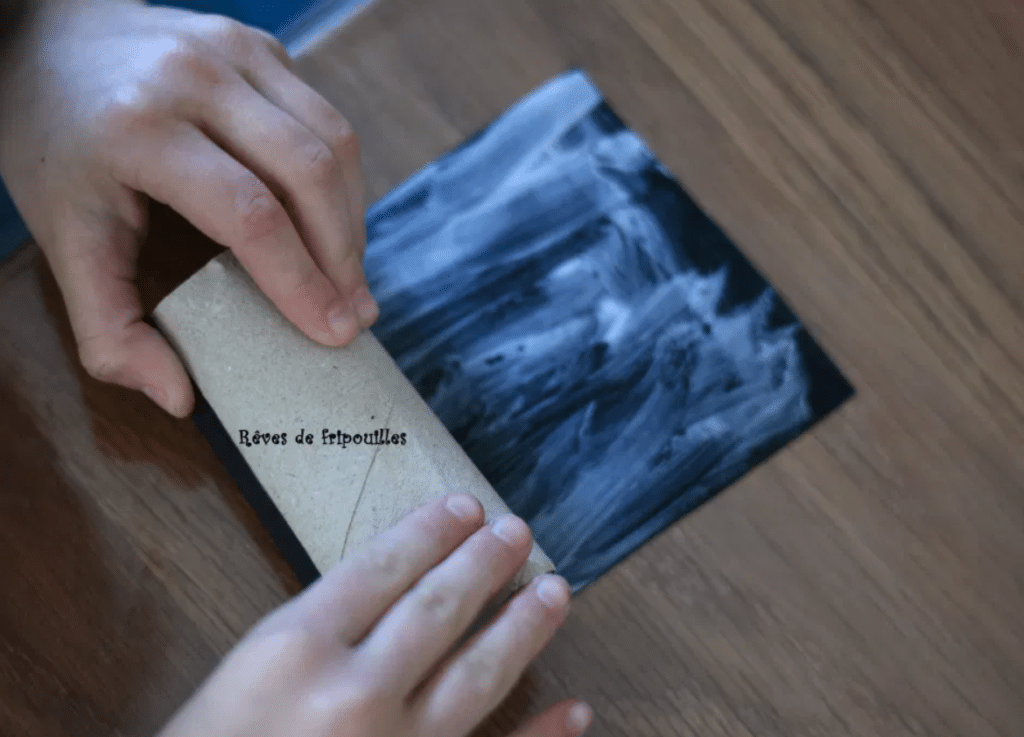
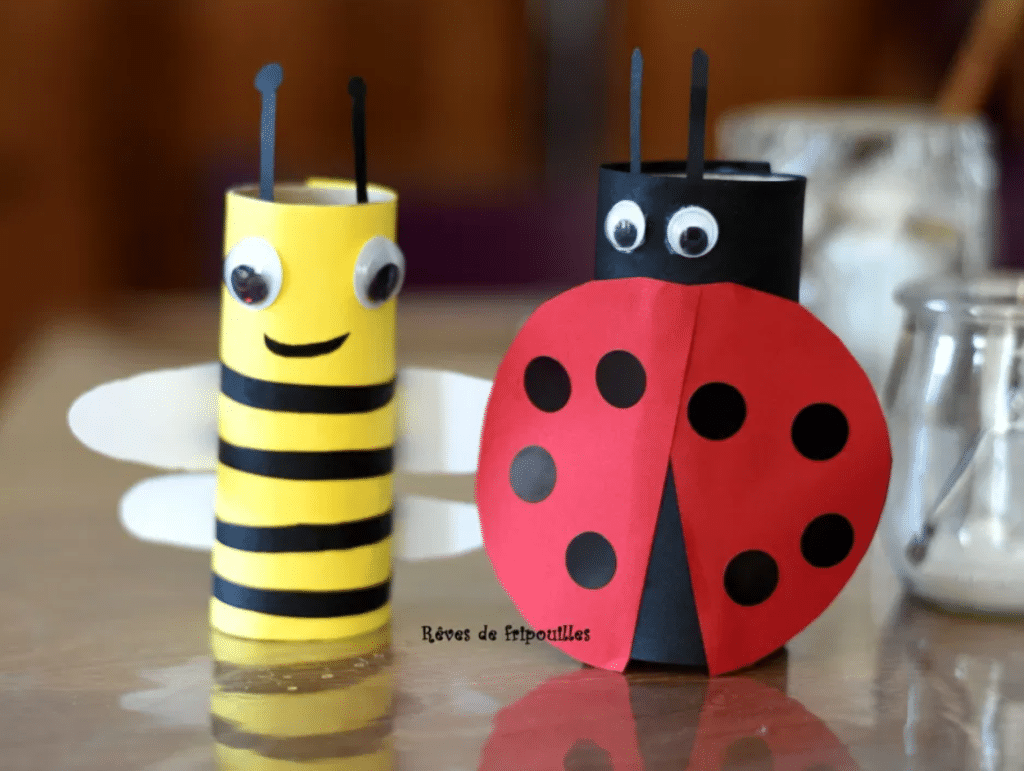
The first step is the same as the bee's: measure, cut out, cover the toilet paper roll but with black paper.
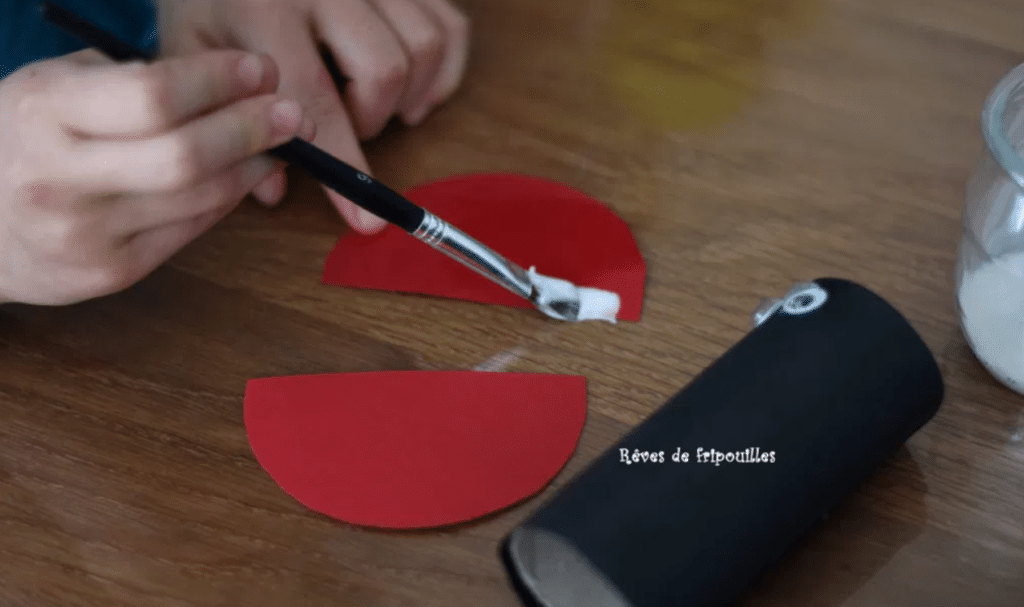
Then cut out two half circles on red paper to make the wings.
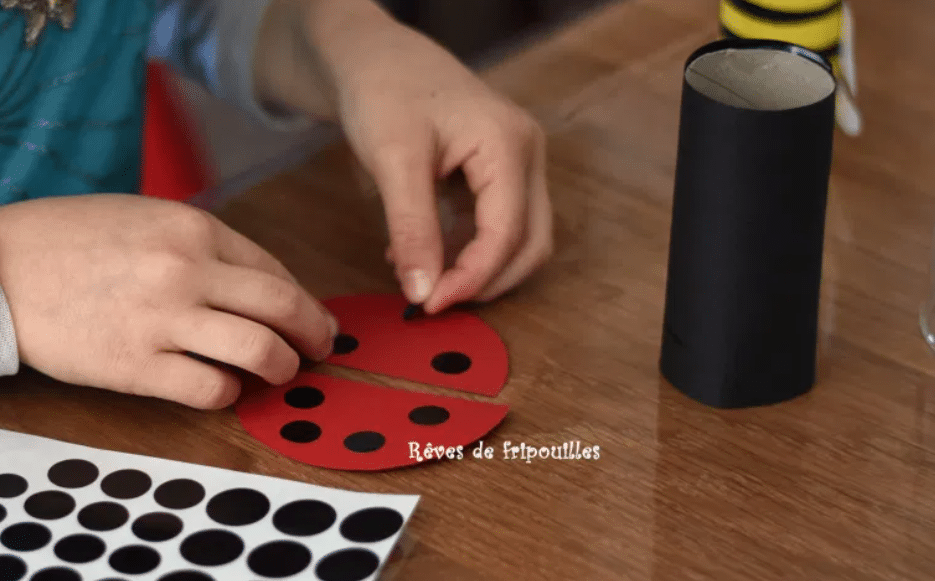
For the black dots on the ladybug, you can either glue black stickers on the wings or draw black circles with a marker on the red paper. Finally, draw and cut out the antennae from black paper like the bee and add the eyes.
Butterfly
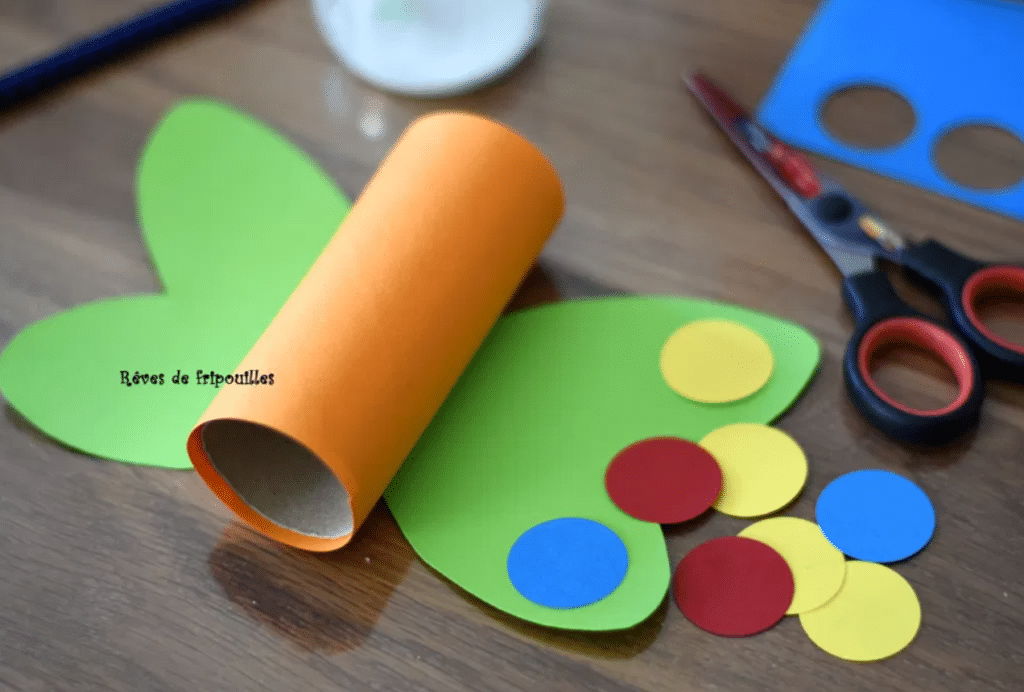
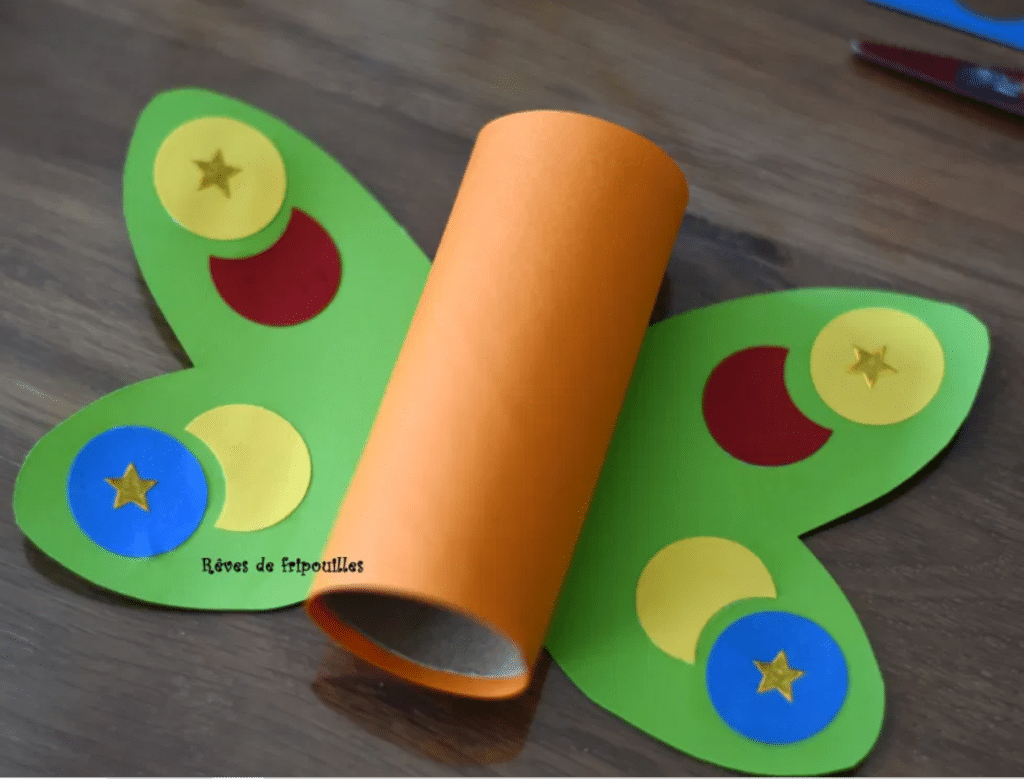
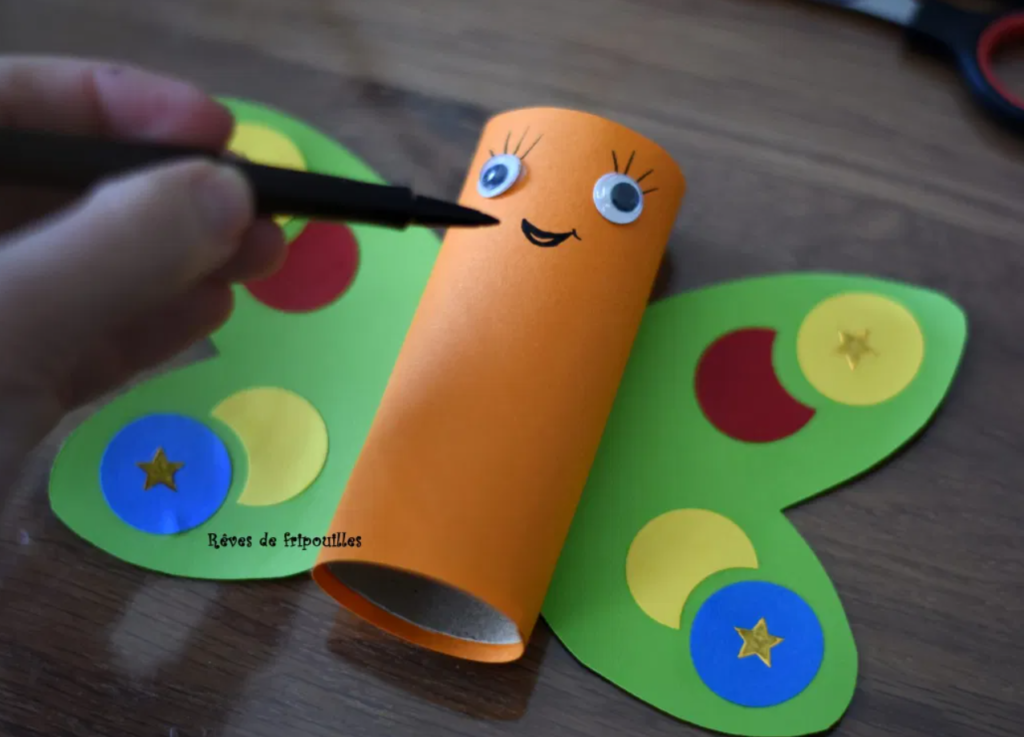
In the same way as the two previous insects, cover the toilet paper roll with colored paper. For the butterfly, however, you can choose any color you like.
Draw and cut out the wings, then glue them to the back of the butterfly and decorate them as you like! Drawings, stickers, collages, glitter....
Also learn how to make an origami butterfly with our article : Origami for kids: 13 simple figures to make
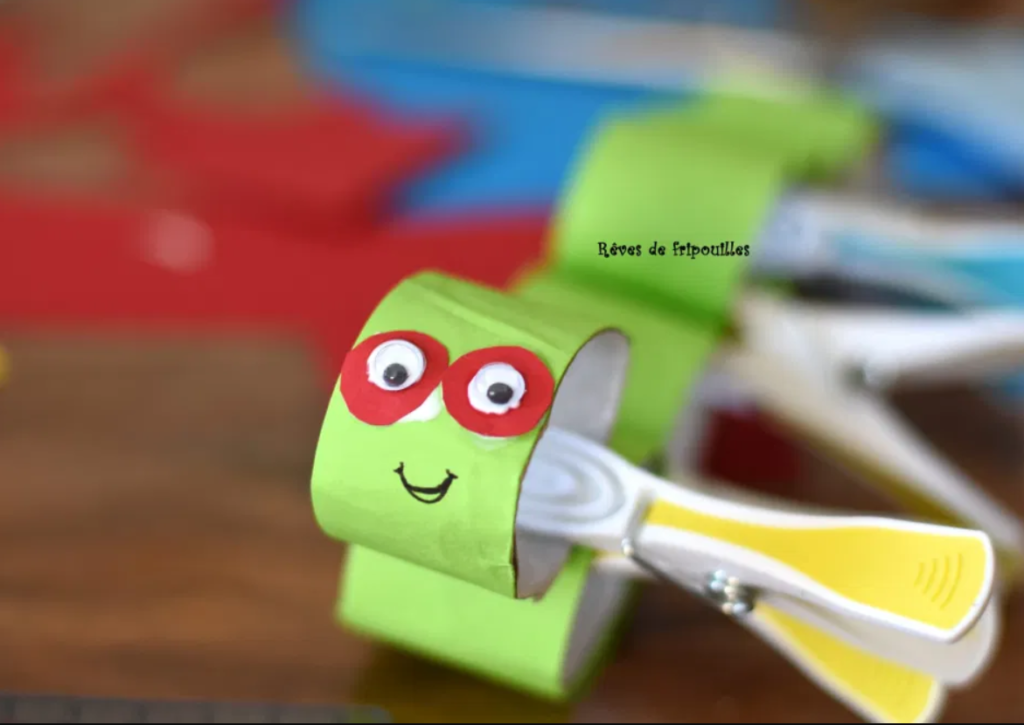
Caterpillar
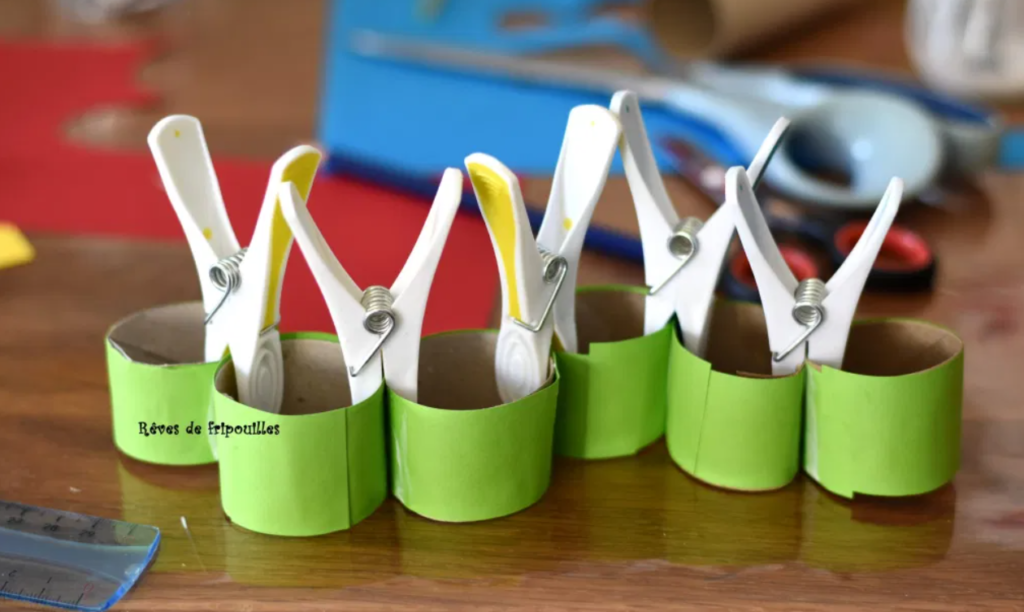
For the caterpillar, you will need two toilet paper rolls that you cut into 3 equal parts each. Then cover the paper rolls with premeasured green paper (as with the previous insects).
Then you glue each piece to form the body of the caterpillar (hold the body of the caterpillar with clothespins and let it dry)
Draw eyes and a mouth on the head of the caterpillar. You can also make antennae for the caterpillar in the same way as for the other insects and glue them on the head of the caterpillar.
For the DIY in detail, it is here !
Race of the caterpillars
Let's race? Prepare your caterpillars and let's go! This easy DIY will allow you to challenge yourself by racing!
Which of you will have the most breath?
Making caterpillars couldn't be easier! Besides, all you need is paper and a pair of scissors!
We let you watch the video tutorial and follow the steps!
Once your caterpillars are ready, it's time to take a straw and a big breath to try to get to the race first.
https://www.pinterest.fr/pin/329959110202855193/Rainbow cardboard plate
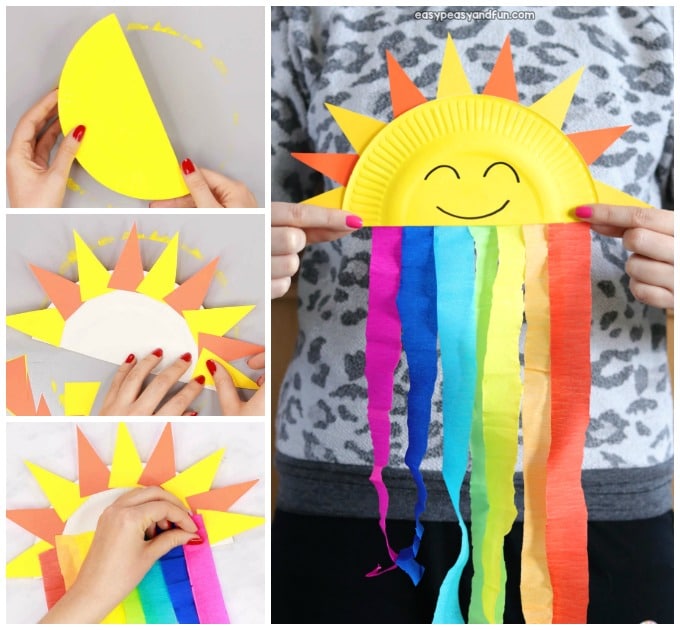
A beautiful rainbow for pep, energy and color! You will need:
- Cardboard plate
- Yellow paint
- Orange and yellow paper
- Rainbow colored crepe paper
- The glue
- The scissors
- Marker
First, start by painting the paper plate yellow. When the paint dries, fold the paper plate in half and cut along the fold to make two half circles. You will need half of the plate later.
Then draw a smiley face on half the paper plate!
Cut small triangles out of orange and yellow paper and then glue them to the back of the paper plate as shown in the picture.
Make way for the rainbow. Cut out the crepe paper and glue the different colors to the back of the paper plate.
And here you have a pretty sun with a rainbow and moreover, you made it by recycling a paper plate!
Source of 'manual activity: EasyPeasyAndFun
Spring craft for the little ones: flowers with a balloon
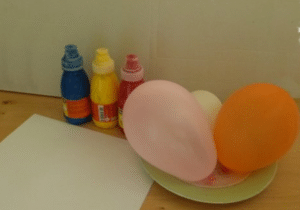
Even the little ones are served! With this activity idea, they will have a lot of fun! Pretty flowers, color, balloons... Your little ones will be ecstatic with this manual activity. In addition, this toddler DIY works on their fine motor skills.
This spring craft is very simple to make, you will need :
- Painting,
- Balloons more or less inflated,
- Paper,
- A plate to put the paint on,
- A brush or marker to trace the stems of the flowers.
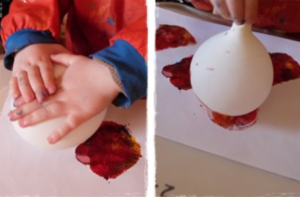
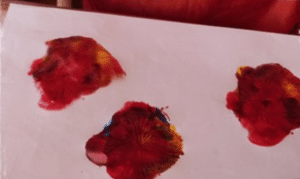
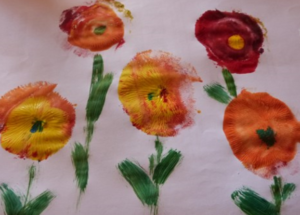
After gathering the materials, the concept is simple: the child simply takes a balloon and dips it in the plate full of paint. Once the balloon is soaked in paint, he will then dab it on a leaf to form his pretty flowers. You can also do it with several colors at the same time!
To finish, add stems to the flowers with a brush or green marker.
Spring DIY must-have: Customize your flower pot
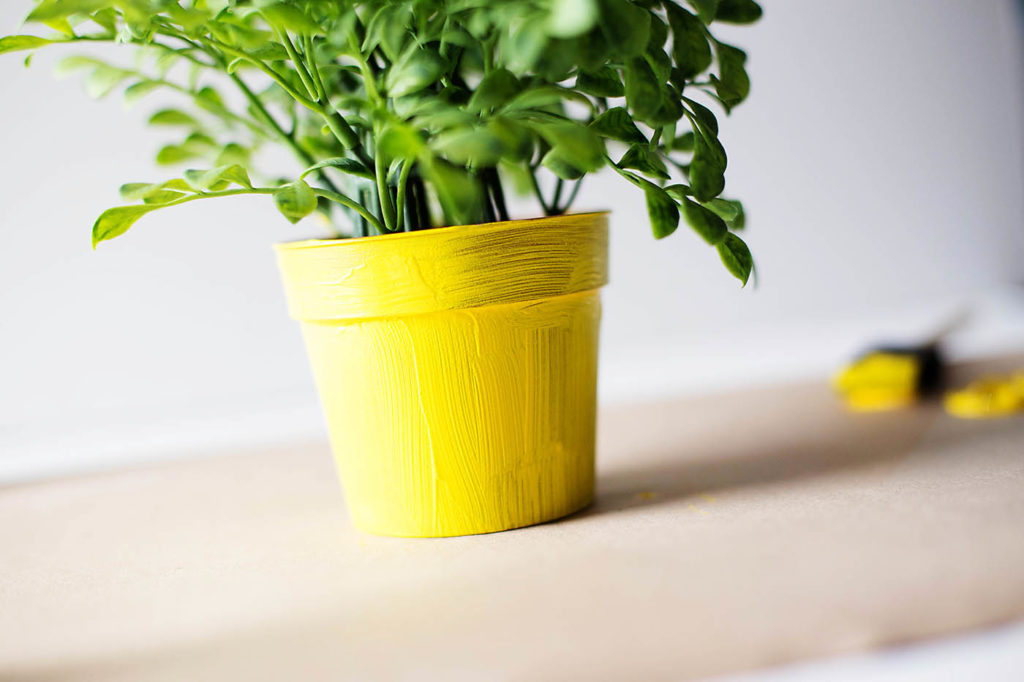
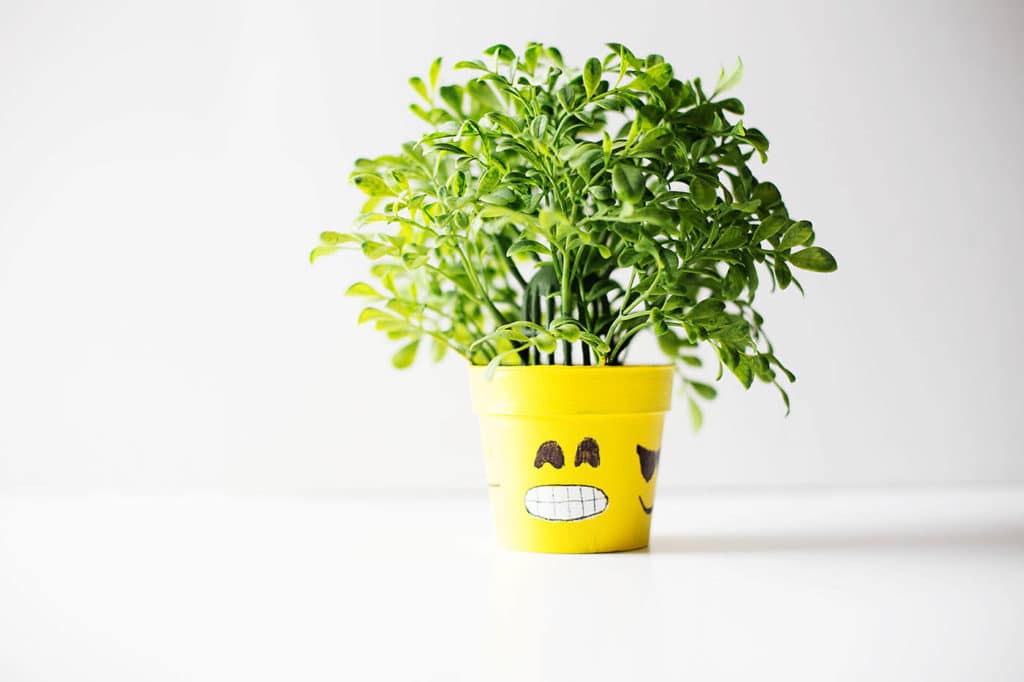
To welcome the beautiful flowers of spring, there is nothing better than a pot this beautiful! Make an emoji pot that looks like you! All you need is :
- Your clay pot
- Yellow and white acrylic paint
- Black marker
- Brush
First, give the pot a few good coats of yellow and let it dry completely.
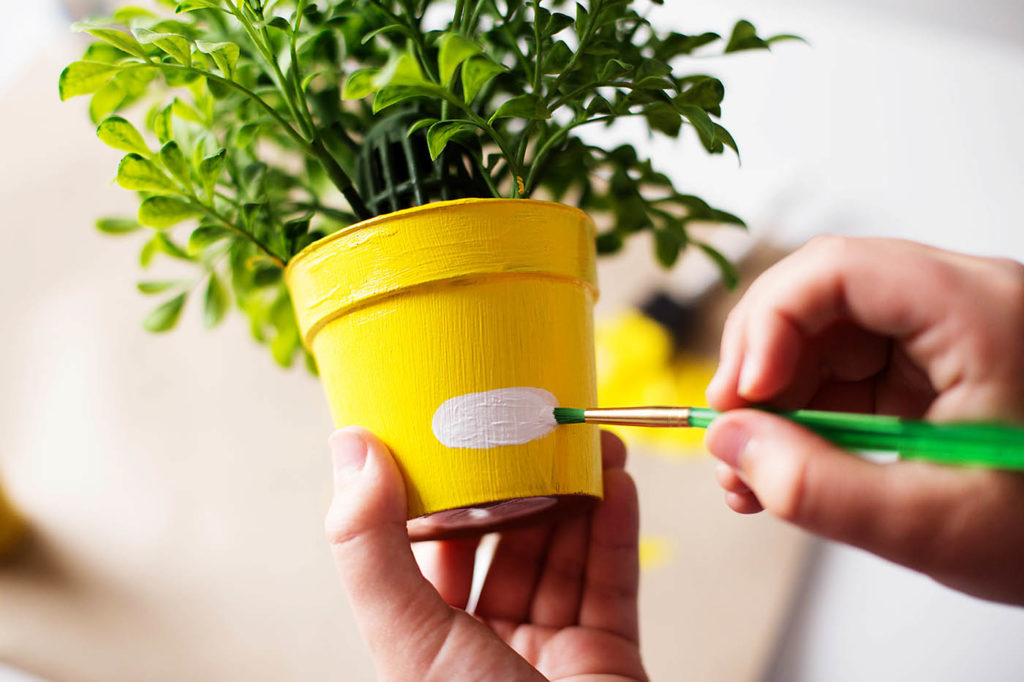
You can make one face per pot or several and turn it around to show your mood! Using a small brush first, make a small white spot to represent the teeth.
Then draw the rest of the face with the black marker. Finally, add the pink, blue, red or any other color related to the emoji you want to make.